How to create a list-cleaning automation
Regular contact list maintenance is essential to achieving great results in your email marketing. A key aspect of that process is removing inactive contacts from the list.
We explain how to do that manually in this article, but you can also use our automation tool for that purpose. Thanks to this approach, you won't have to repeat the process every few months.
The idea is to check if your audience interacts with emails at predefined intervals and send them a re-engagement email if they don't. If the re-engagement email doesn't win them back, they will be automatically unsubscribed from your list.
In our scenario, we prepared an evergreen set of automations that you can use to clean your lists on autopilot:
- List-cleaning automation
- Cleaning trigger automation
- New contacts cleaning automation
Create a "List-cleaning automation"
To start, create a new automation from scratch, choose the list it's linked to and ensure that the "Allow contacts to repeat" option is enabled, so that this automation is evergreen.

If you only have one list, your automation will be connected to this list automatically.
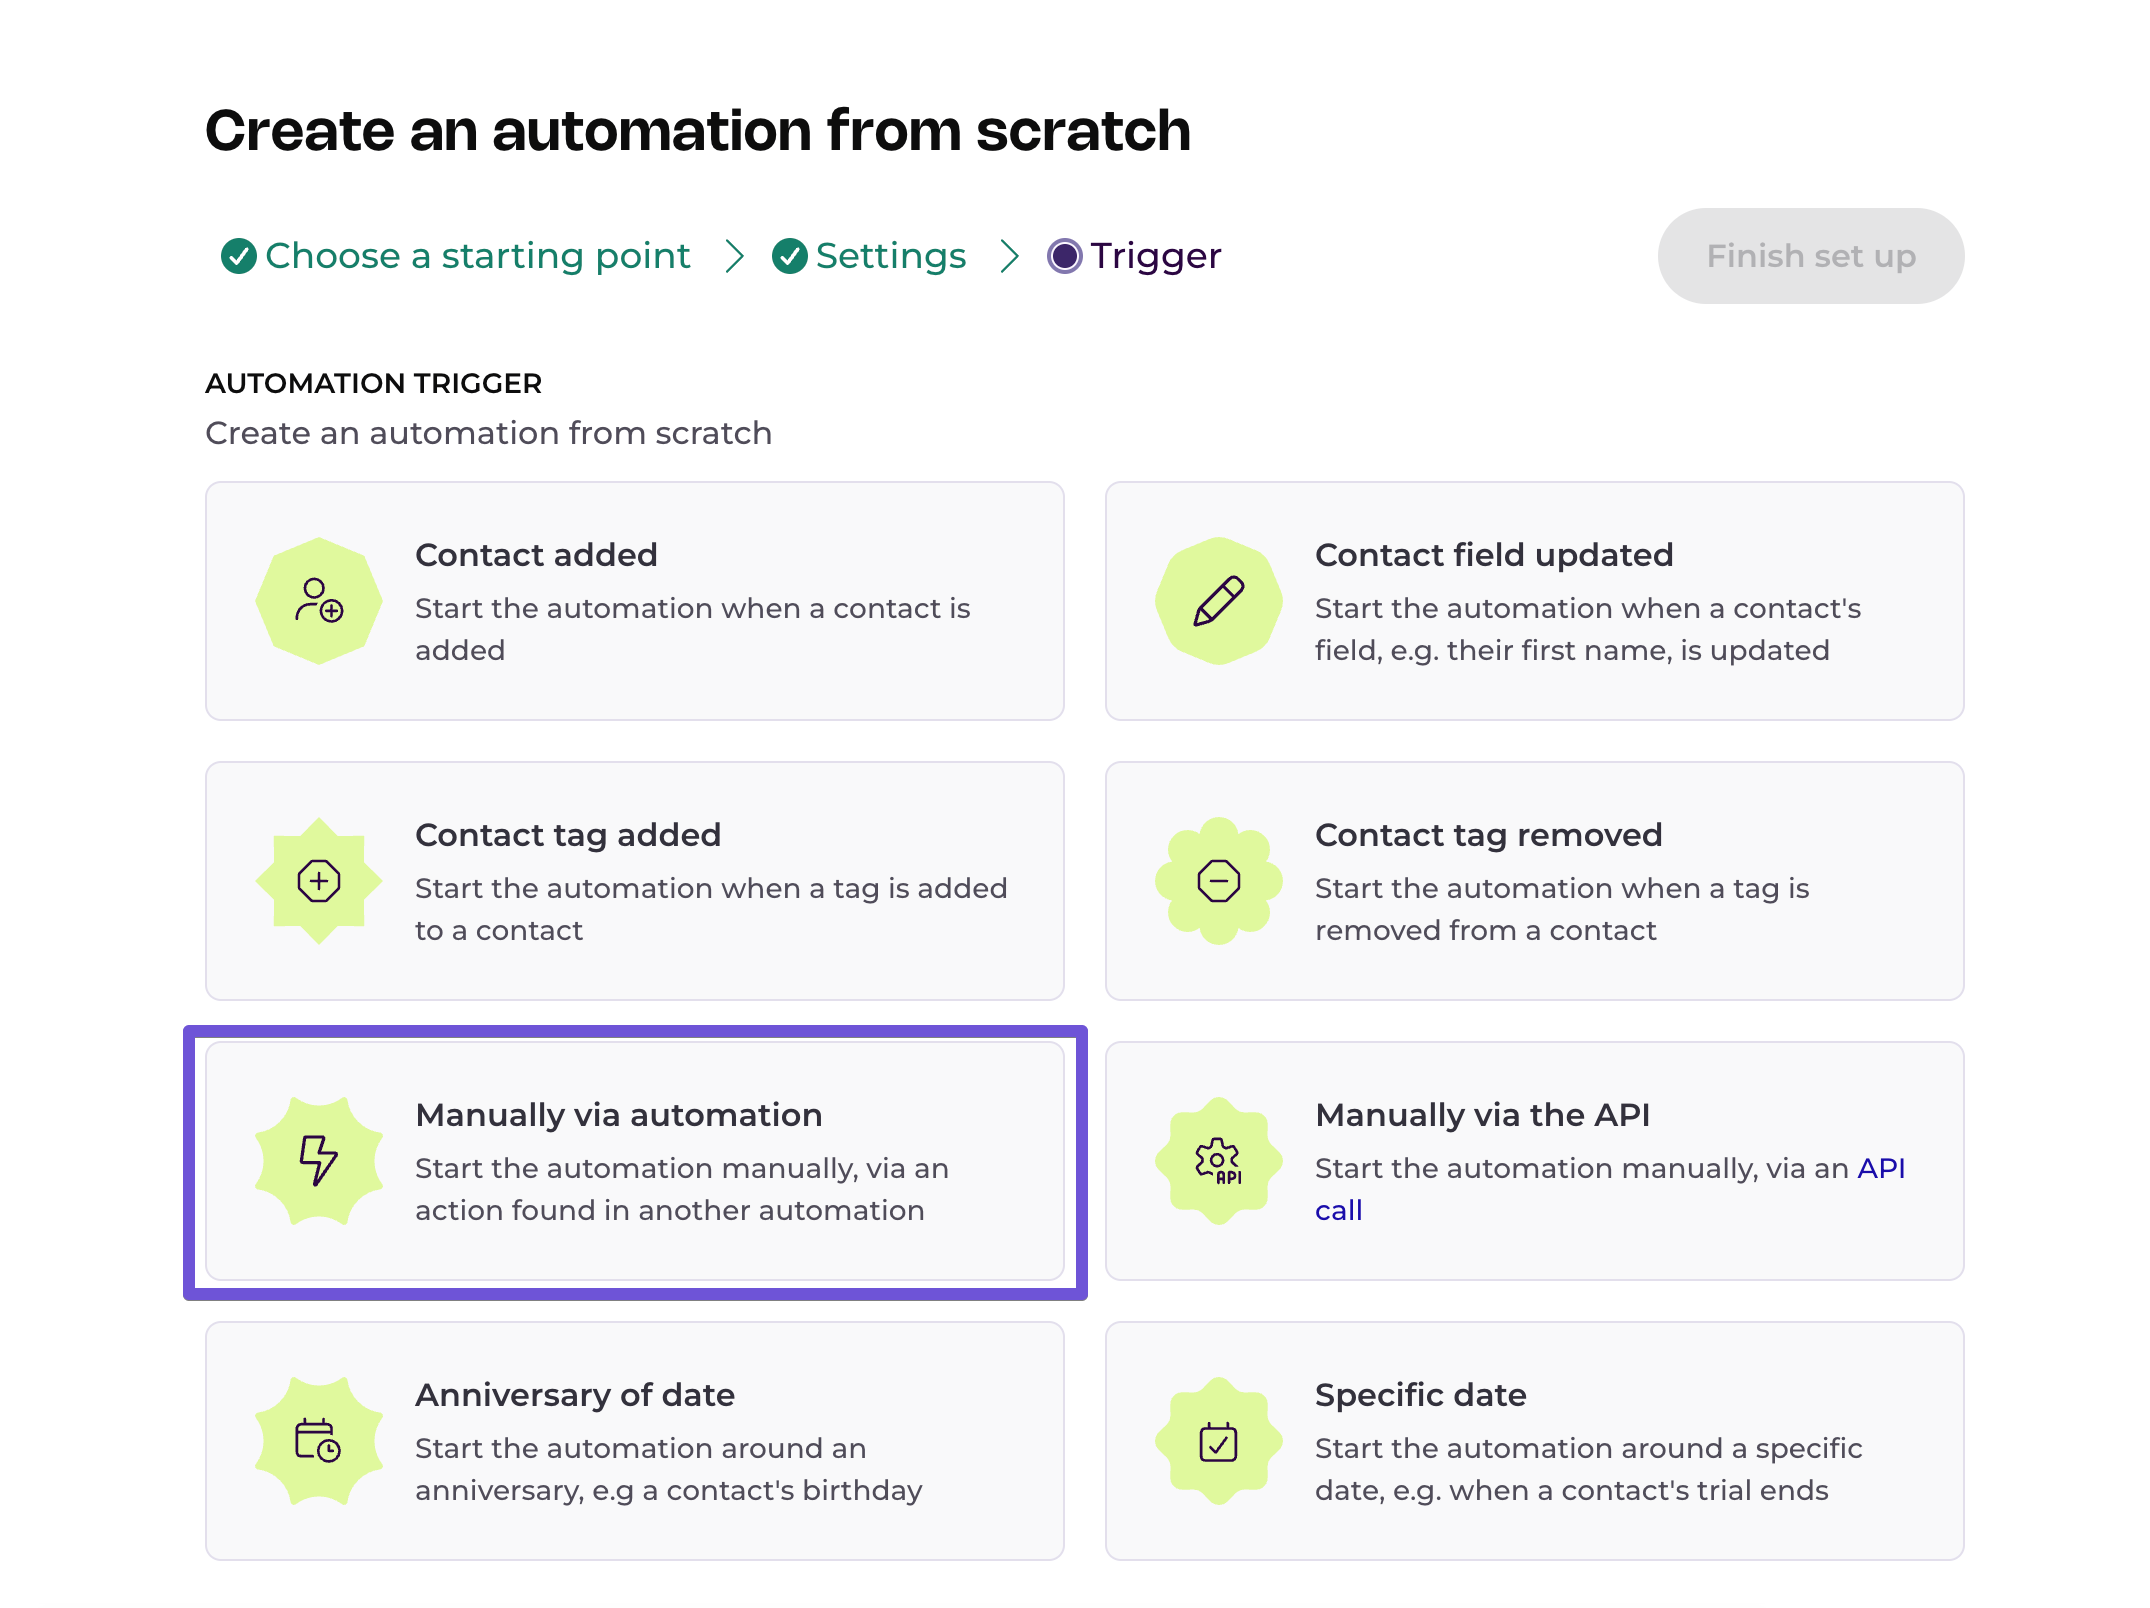
Then, choose the automation trigger. We recommend the "Contact tag added" trigger as it allows you to quickly include all existing contacts by tagging them within the list using the Actions feature. Here, we used the "cleaning" tag.
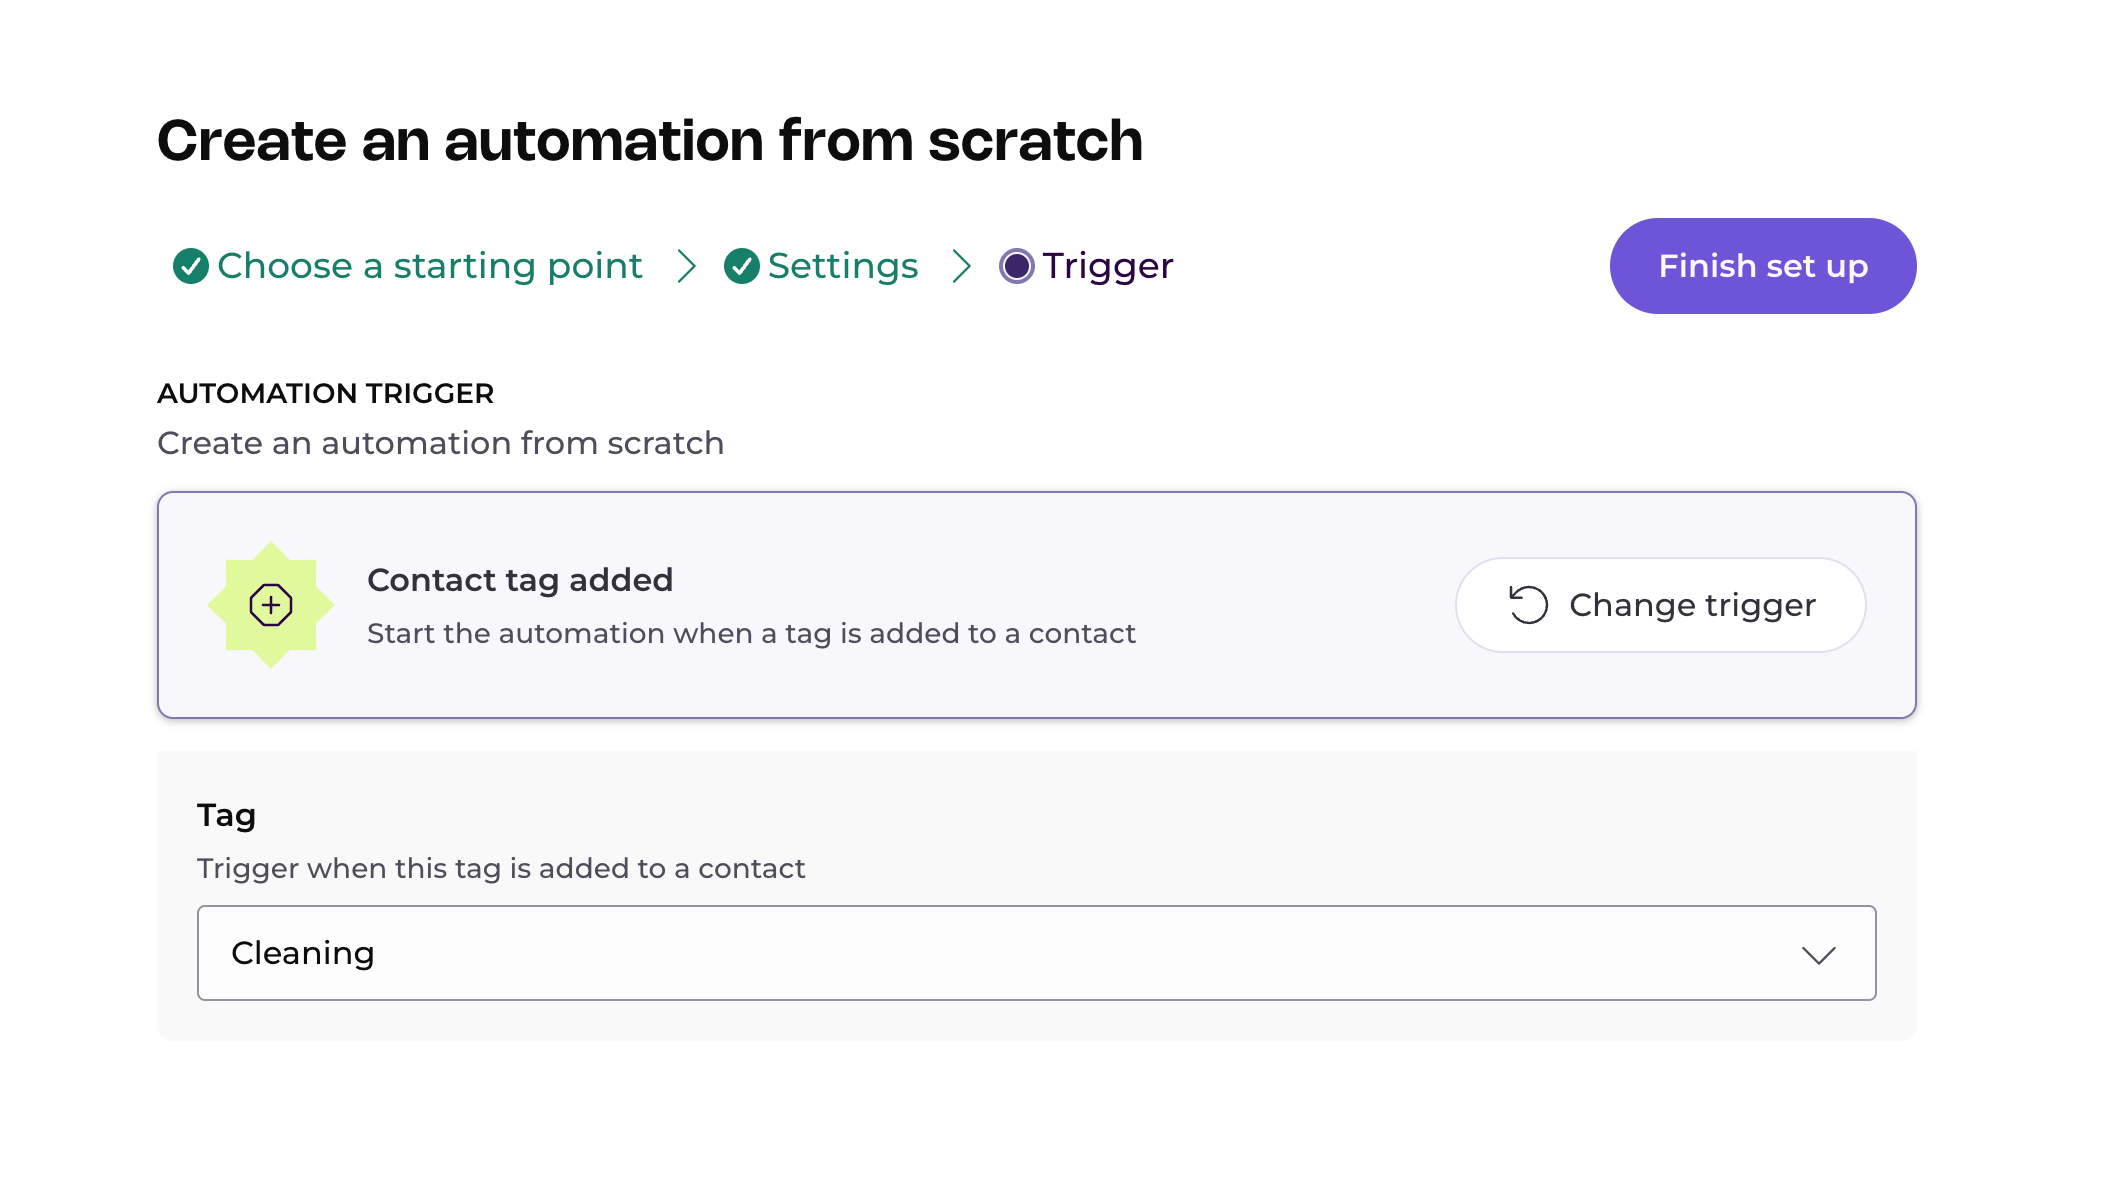
Click "Finish set up", then add a condition step – this will allow you to filter out contacts that are indeed inactive. We recommend choosing "Contact activity", "active or added within" the last 90 days, although you're welcome to use different parameters, according to your needs. You can learn more about activity-based segmentation options in this article.

Now, you can see that your automation splits into the "Yes" path (for active contacts) and "No" path (for inactive contacts).
Inactive contacts

If a contact hasn't been active in the last 90 days, they'll be directed to the "No" path, where we send them a "Re-engagement" email. For tips on how to create a re-engagement email, read this article.
We then wait for seven days before checking if your contacts opened that email or any other email during the waiting period (using a condition step after the wait step).

This condition splits into two paths: "Yes" for those who got reactivated and "No" for those who ignored this email. If a contact enters the "No" path, we send them a last email letting them know we unsubscribed them and providing instructions on where they can sign up again if they'd like to come back.

You can also send another "last chance" kind of email before unsubscribing your contacts, you can give people some more time before unsubscribing them, introduce a condition before unsubscribing or just tag the contacts as "inactive" and exclude them from regular emails instead of unsubscribing them – the specifics are completely up to you.
Active contacts
Now, let's focus on the "Yes" paths, which are the routes that the active contacts will take. Since we don't need to re-activate those contacts, we don't want to send them any re-engagement emails. Instead, we need to move them to another automation.
Create a "Cleaning starter" automation
To make sure the List-cleaning automation is evergreen, we need to link it to another automation that will trigger it periodically. So let's create another automation – we'll call it "Cleaning starter". Make sure that it's connected to the same list as the List-cleaning automation and that the option to repeat it is enabled.

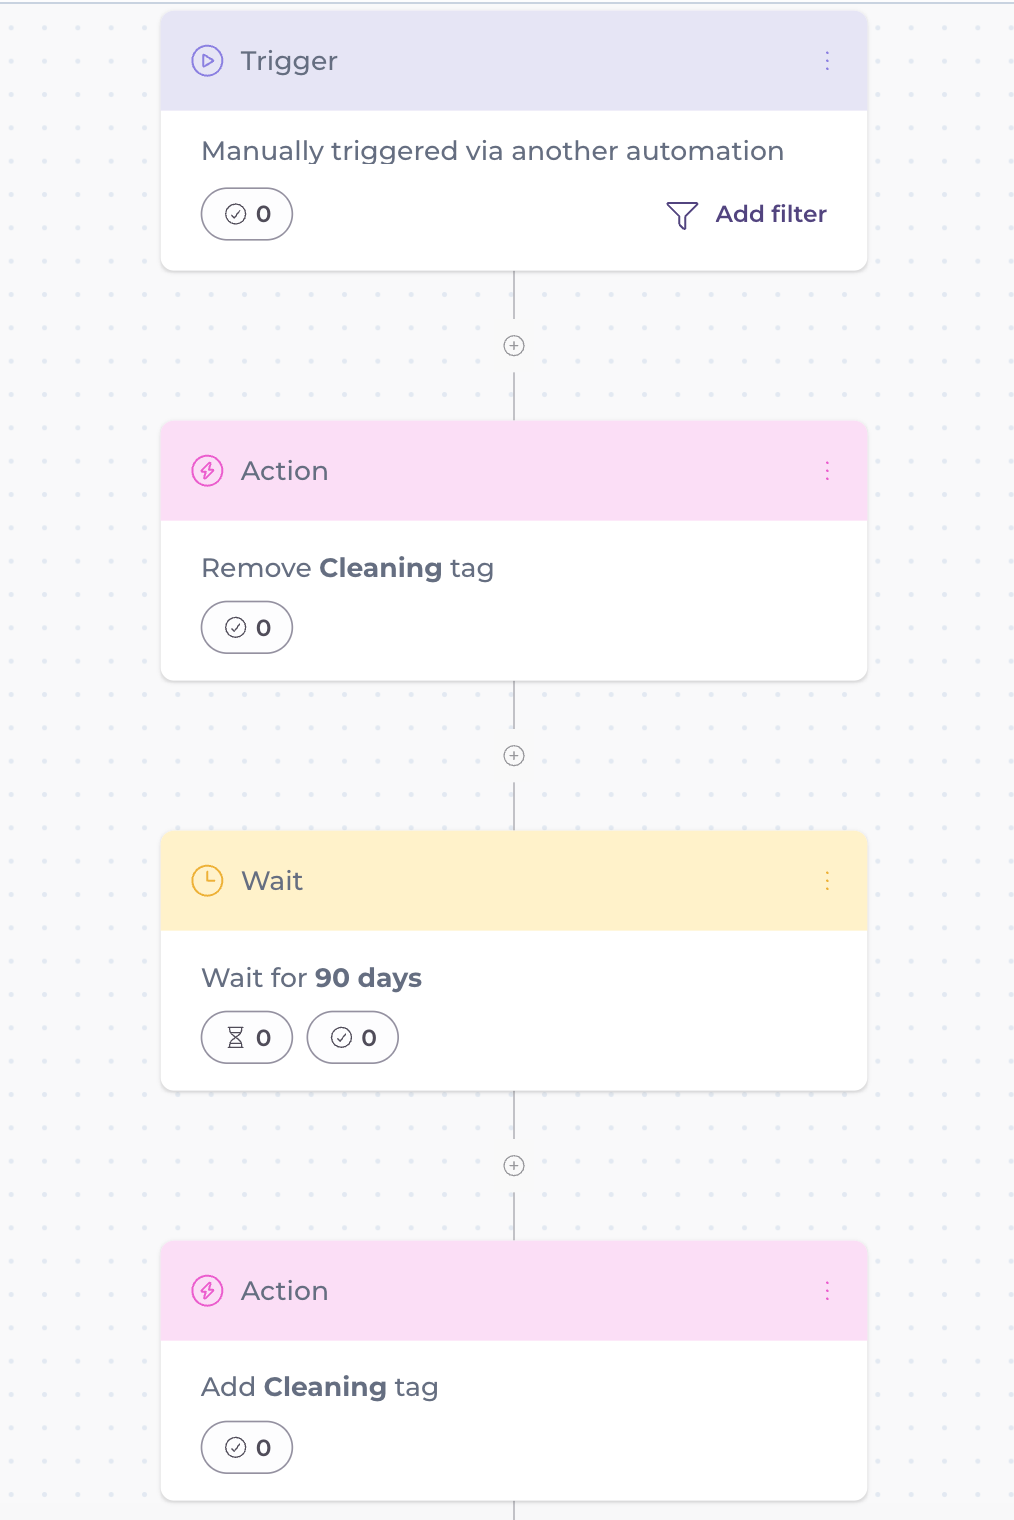
Its trigger should be "Manually via another automation" so that we can easily trigger it at several points of the List-cleaning automation.
This automation only needs three steps after the trigger: remove tag "cleaning", wait 90 days (or any number of days you prefer), then add tag "cleaning". This final step will trigger the List-cleaning automation.
Once done, click "Start" to enable this automation and return to the List-cleaning automation.
Now add an Action step to each "Yes" path and select "Trigger another automation", then select the "Cleaning starter" automation.

Trigger the List-cleaning automation for new contacts
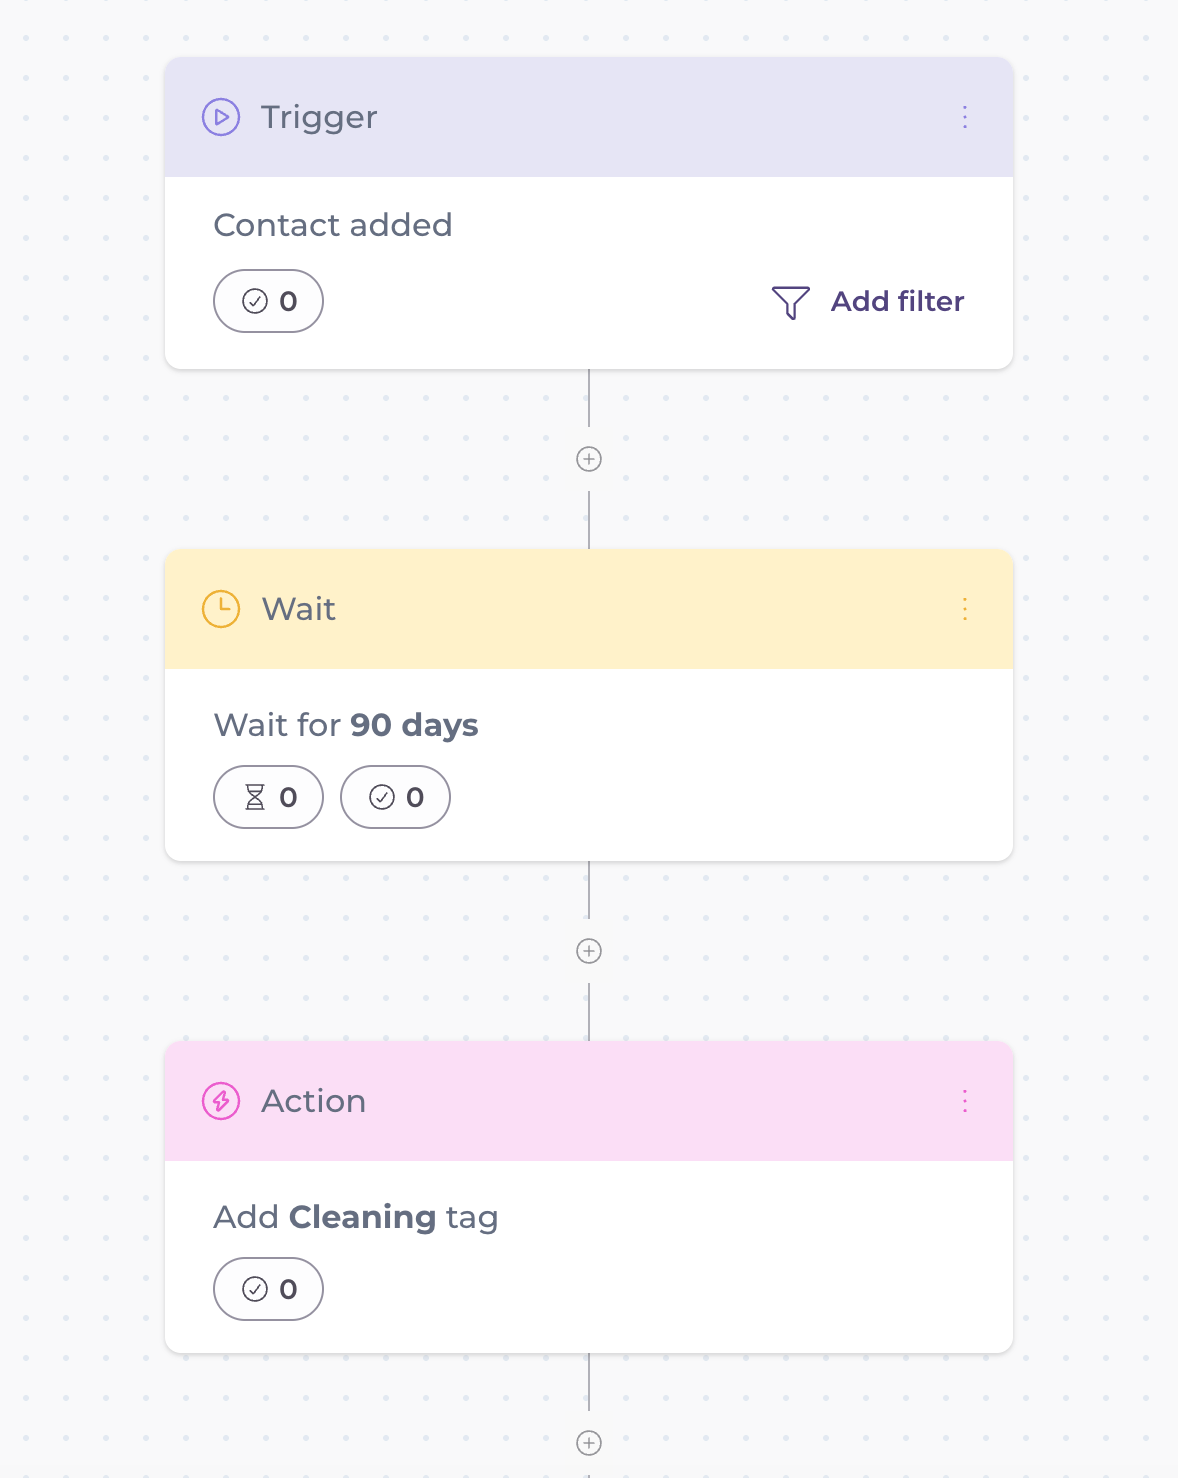
Finally, create an automation that will trigger the List-cleaning automation for all new contacts. Make sure it's connected to the same list as the two previous automations.

Its trigger needs to be "Contact added", and you need to add two steps: a Wait step of 90 days and an Action step "Add tag" – "cleaning".
And that's it – once you've started all three automations, you'll have a completely automatic way to clean your list.